Nurtch trial image is available at docker hub. Latest image can be pulled with,
docker pull nurtch/nurtch
You can use Kubernetes, ECS or any deployment tool of your choice to setup Nurtch with this image.
Following environment variables are required to be set on the container:
PORT: Container port at which the Nurtch application would run.
ROOT_USERNAME: Username of root user for your Nurtch installation.
ROOT_PASSWORD: Password of root user for your Nurtch installation.
S3_BUCKET: Bucket to store executable notebooks and other Nurtch config. You need to create this bucket manually. See steps below.
AWS_REGION: Region in which the S3 bucket resides
AWS_ACCESS_KEY: Access key for AWS IAM user who has access to S3_BUCKET.
AWS_SECRET_ACCESS_KEY: Secret access key of AWS IAM user who has access to S3_BUCKET.
S3_ENDPOINT_URL (optional): Set the appropriate url if you want to use your own distributed storage backend such as Minio/Ceph instead of S3. Defaults to http://s3.amazonaws.com
Instructions for creating S3 bucket and IAM user.
Go to AWS S3 console and create a new bucket with any name. Choose all default options.
Go to IAM policies and create a new policy to allow access to your S3 bucket. You can paste the following JSON in policy creator. Replace <YOUR_BUCKET_NAME> with your actual bucket name.
Create new IAM user for Programmatic Access. Attach the policy that we created earlier. Note down AWS access key and AWS secret access key for the IAM user you just created.
If you have any questions click on the chat box at the right bottom corner or write to us at team@nurtch.com.
Install via Amazon Machine Image (AMI)
We've made an Amazon Machine Image (AMI) so you can quickly deploy on AWS EC2.
Prerequisite
You need an AWS account. If you don't have one, create it from here.
Installation Overview
Spin up a new EC2 machine from an AWS AMI. Nurtch server is already configured and running on this AMI.
Edit Nurtch config file to change default login credentials and use your own S3 bucket for storing notebooks.
[Optional] Add a CNAME for easy access to Nurtch trial.
Step 1: Spin up EC2 machine
Launch an EC2 instance using the link below.
Select appropriate instance size. In most cases t2.micro should work fine for trial purpose. Choose default option for all other configuration & launch an EC2 instance.
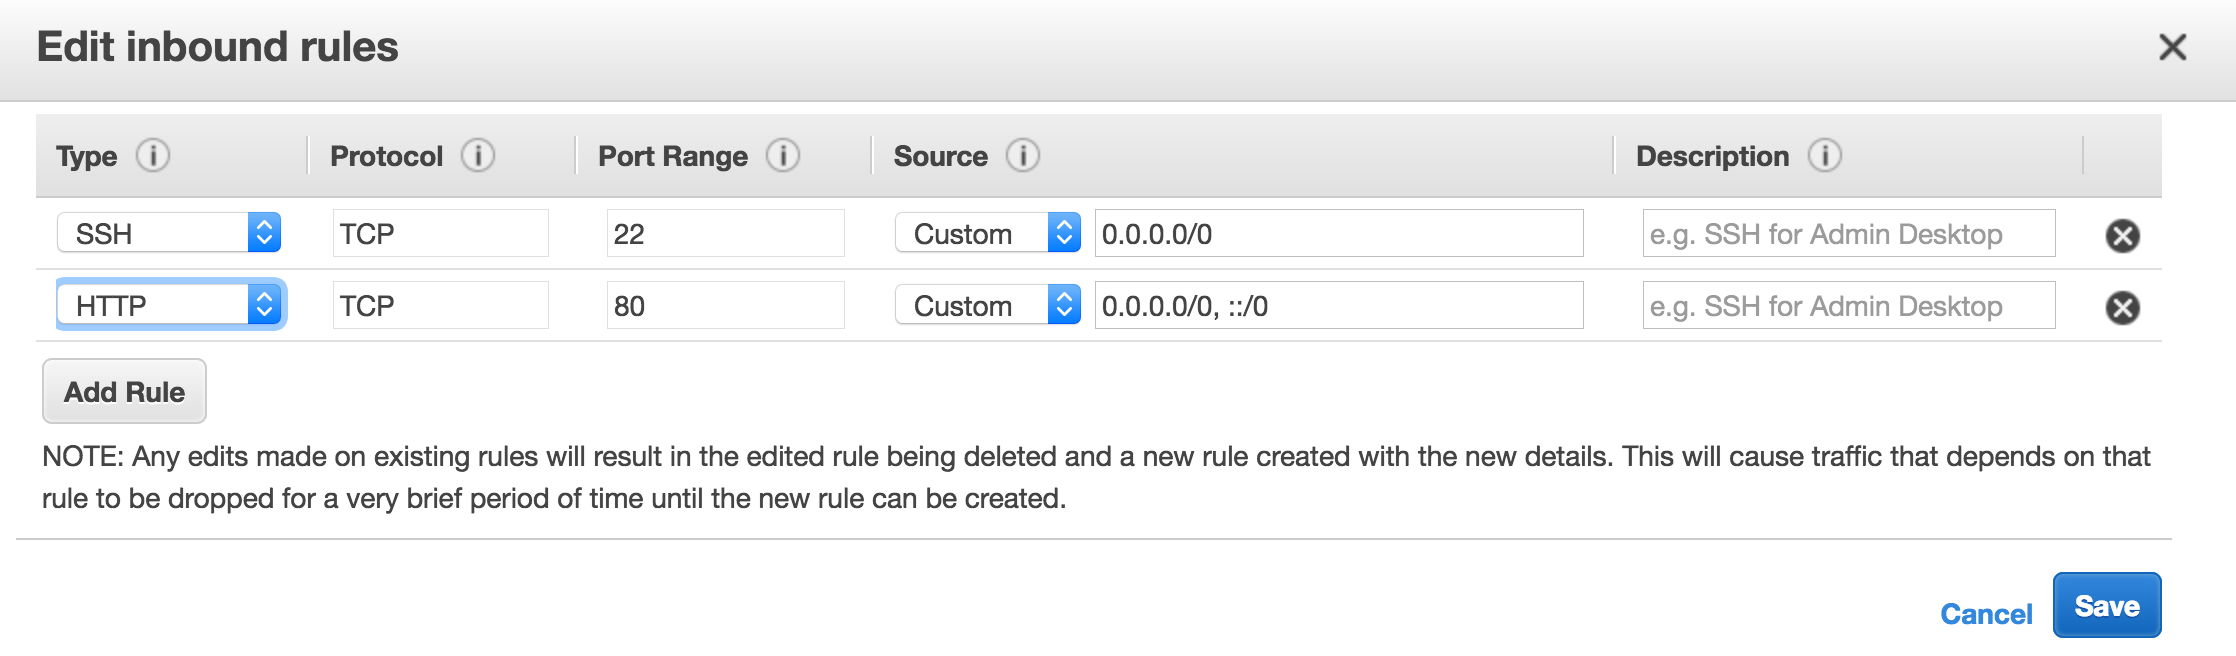
Step 2: Configure Security Group
We need to open port 80 for incoming HTTP traffic to Nurtch server. Select your EC2 instance on AWS console and click on the Security Group under Description tag. Inside Security Group settings, edit the inbound rules and allow HTTP traffic to port 80 as shown below.
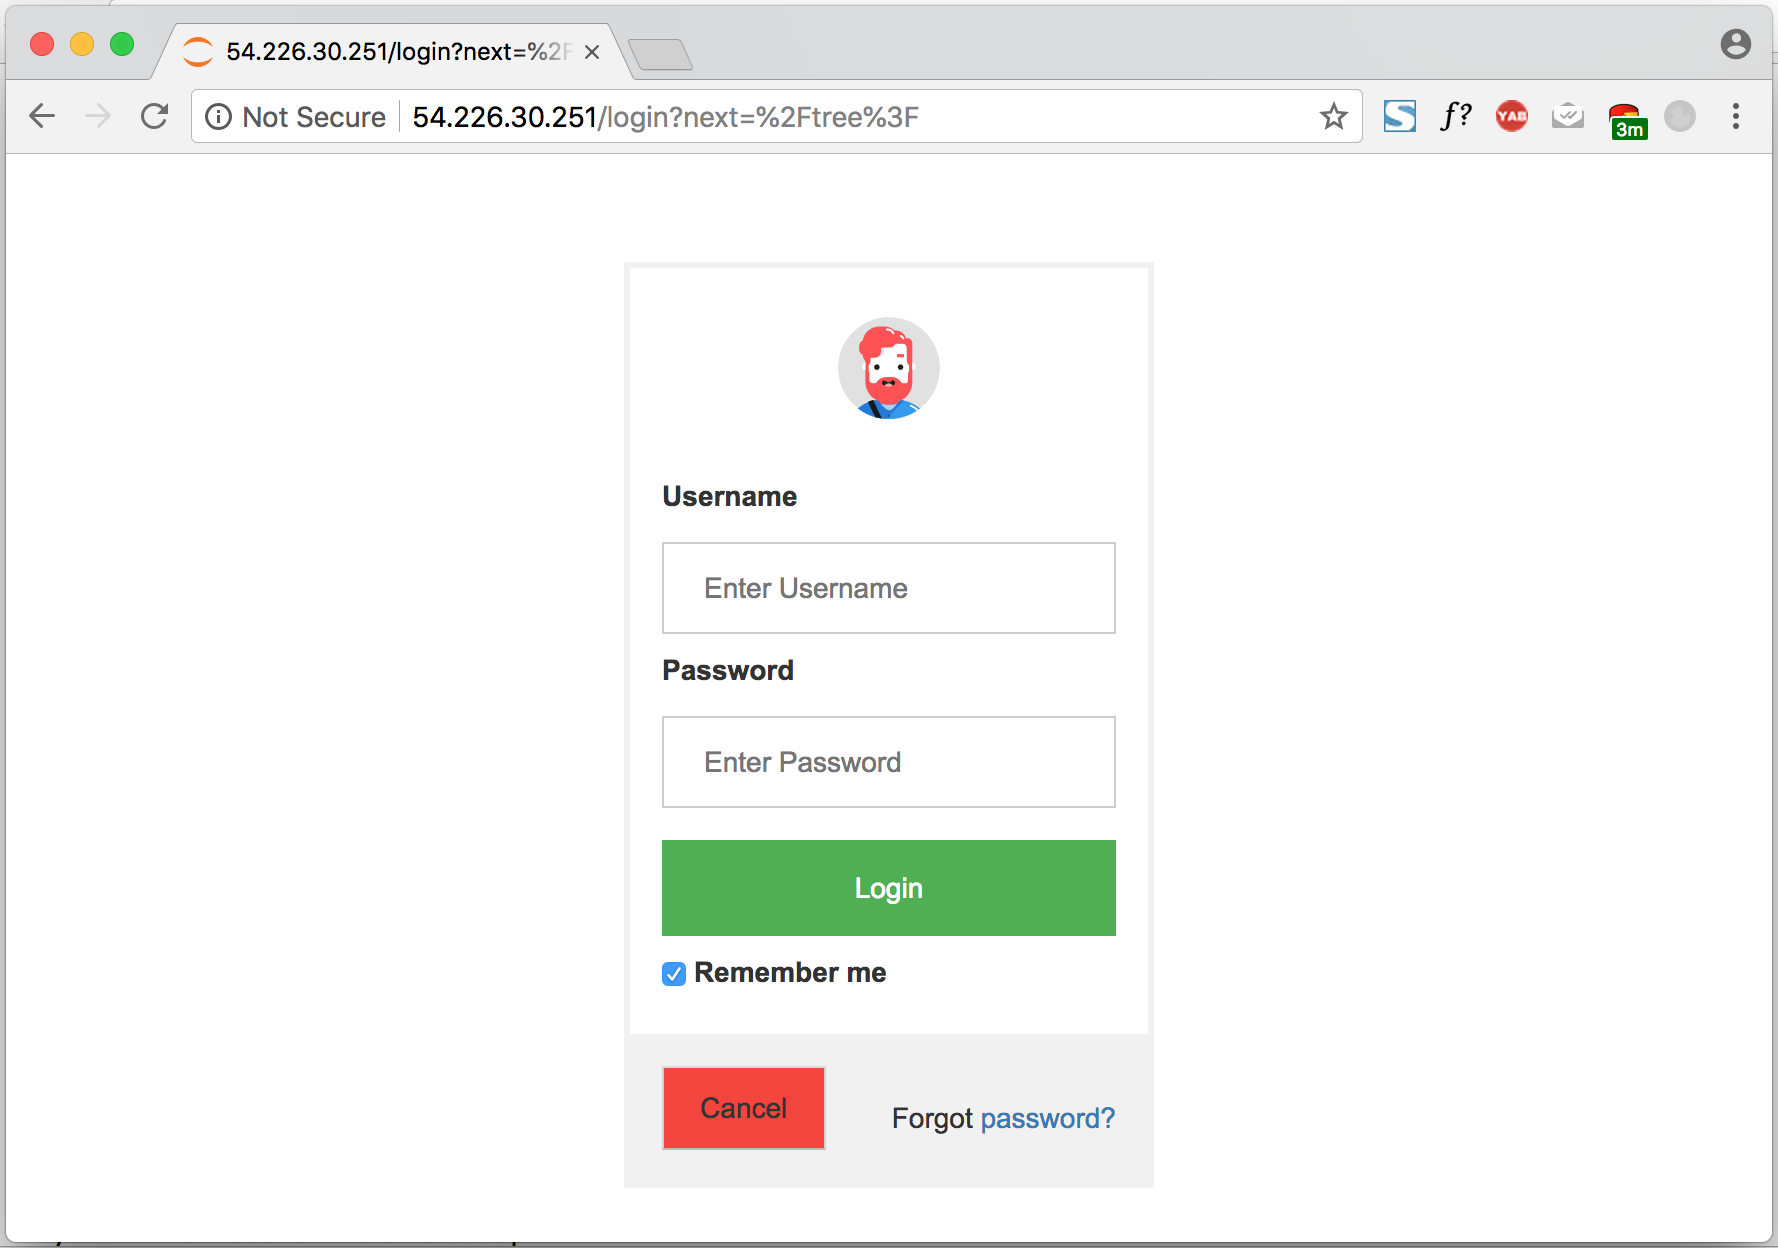
Step 3: Test your installation
At this point you should be able to access the Nurtch server in your browser. From EC2 management console copy the public IP address of your instance. Hit it in the browser and you should see the Nurtch login page. If you see nginx error wait for couple of minutes for Nurtch to startup fully on the ec2 machine.
You can use our default credentials (admin/qf@123) to log into Nurtch. You might see some existing notebooks after you login. Note that, currently your installation is using one of our S3 buckets for storing notebooks. Let's change that to use your own S3 bucket in the next step.
Step 4: Create S3 bucket and IAM user
Go to AWS S3 console and create a new bucket with any name. Choose all default options.
Go to IAM policies and create a new policy to allow access to your S3 bucket. You can paste the following JSON in policy creator. Replace <YOUR_BUCKET_NAME> with your actual bucket name.
Create new IAM user for Programmatic Access. Attach the policy that we created earlier. Note down AWS access key and AWS secret access key for the IAM user you just created.
Step 5: Configure
Let's update the configuration to use your own S3 bucket.
SSH into the EC2 instance using the key you chose at instance creation time.
Set root_username and root_password to change the login credentials.
Set aws_access_key and aws_secret_access_key of the IAM user we created in previous step. Set s3_bucket for the bucket we created in previous step.
Save the configuration file. Restart nurtch to load the new configuration.
supervisorctl restart all
Step 6: Validate
Put the EC2 instance's IP address in the browser again and make sure the login page comes up. Now logging in with your new credentials should succeed. Create new notebooks, publish them to S3 and everything should work seamlessly.
If you see any errors about communicating with S3, make sure that IAM user has all the required credentials as mentioned in Step 4.
Step7: [Optional] Add a CNAME
Using IP address to access anything is not fun. Create a CNAME entry with your DNS provider for easy access to Nurtch trial.
If you have any questions click on the chat box at the right bottom corner or write to us at team@nurtch.com.